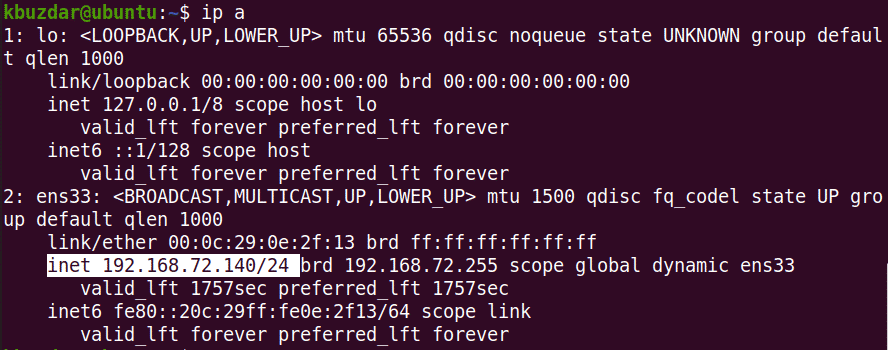
To view the current IP address of your machine, you can use either of the following commands:
$ ip a
Or
$ ip addr
Running either of the above commands will display the IP address information. Note down the name of the interface from the output of the above command.
Configuring
In the following procedure, we will see how to set up the static IP in a Ubuntu system.
Ubuntu 20.04 uses netplan as a default network manager. The configuration file for the netplan is stored in the /etc/netplan directory. You can find this configuration file listed in the /etc/netplan directory the following command:
$ ls /etc/netplan
The above command will return the name of the configuration file with the .yaml extension, which in my case was 01-network-manager-all.yaml.
Before making any changes to this file, make sure to create a backup copy of it. Use the cp command to do so:
Note: You might have a configuration file with the name other than the 01-network-manager-all.yaml. So make sure you use the right configuration file name in the commands.
You can edit the netplan configuration using any text editor. Here we are using the Nano text editor for this purpose.
Now test the new configuration using the following command:
$ sudo netplan try
If it validates the configuration, you will receive the configuration accepted message; otherwise, it rolls back to the previous configuration. Next, run the following command to apply the new configurations.
$ sudo netplan apply
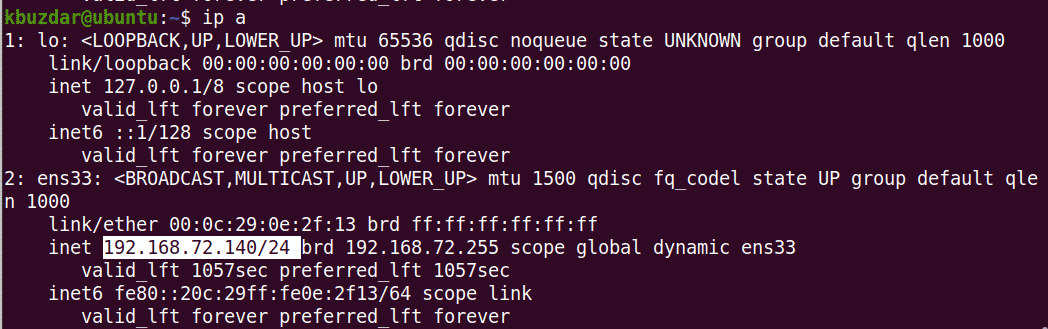
After this, confirm the IP address of your machine using the following command:
Here should be no trick concerning the subject, but I’ve been stuck for a day with it.
OK, having Oracle Linux 8 (CentOS 8), trying to install the postgresql:
sudo dnf install postgresql
The first surprise: by defauld the ancient version 10 is installed. Switch to something more fresh (e.g. 13) and install it.
sudo dnf remove postgresql
sudo dnf module reset postgresql
sudo dnf module list | grep postgre <check, which versions are available in the active repositories>
sudo dnf module enable postgresql:13
sudo dnf install postgresql
Phew, seems we are fine:
sudo systemctl start postgresql
Surprise: Unit postgresql.service could not be found. Take a look on the directories: /var/lib/pgsql – missing /usr/lib/systemd/system/postgresql.service – missing
Why isn’t it in the first google search results, have no idea, even the chatGPT told me about only after several iterations (but the word had been of web-app development, so it is obvious, that I have to create my own DB, but not just to connect to existing one, hovewer it is not obvious, but considered). The missing point – postgresql-server
sudo dnf install postgresql-server
Now run sudo systemctl start postgresql and… it doesn’t work again:
Job for postgresql.service failed because the control process exited with error code.
See "systemctl status postgresql.service" and "journalctl -xe" for details.
At least it is something new and the service exists at all.
Reinstalling of postgresql-package gives no result.
journalctl -xe output:
-- Unit postgresql.service has begun starting up.
postgresql-check-db-dir[1530742]: Directory "/var/lib/pgsql/data" is missing or empty.
postgresql-check-db-dir[1530742]: Use "/usr/bin/postgresql-setup --initdb"
postgresql-check-db-dir[1530742]: to initialize the database cluster.
postgresql-check-db-dir[1530742]: See /usr/share/doc/postgresql/README.rpm-dist for more info>
systemd[1]: postgresql.service: Control process exited, code=exited status=1
systemd[1]: postgresql.service: Failed with result 'exit-code'.
postgresql.service - PostgreSQL database server
Loaded: loaded (/usr/lib/systemd/system/postgresql.service; disabled; vendor preset: disabled)
Active: active (running)
Not so complicated, isn’t? There is not the last trick: the first login is also not so obvious.
After installation PostgreSQL creates the UNIX user postgres with no password, that means, that this is generally blocked account and here is no way to login with the credentials directly. But if you try to open PostgreSQL console using any other account (even the root) the message appears:
psql: error: FATAL: role "username" does not exist
Here is the way to set the postgres user password with root permissions, but this default account makes the DB vulnerable against password hacking attacks. The proper way is to enter postgres account using
sudo su - postgres
or
sudo runuser postgres.
Then run the PostgreSQL console:
psql
And create your desired user account with password.
postgres=#CREATE USER username WITH PASSWORD 'secret';
And maybe it is necessary to give the user the permission to do something (pick your favorite):
GRANT CONNECT ON DATABASE database_name TO username;
GRANT ALL PRIVILEGES ON DATABASE database_name TO username;
ALTER USER username CREATEDB;
ALTER USER myuser WITH SUPERUSER;
PSQL can’t be open without any database, but the only existing are:
postgres
template0
template1
The existing databases may be listed with /l psql command. There is better not to connect template0 and template1 databases, or else there some troubles with creating of new databases will occur until the postgresql service is restarted.
If you enter with postgres user, psql opens the database with according name automatically. But in the case of cusomized user we have to point the database name directly:
psql -U username -d postgres
…but not so quick. By default any users from local machine have ‘ident’ authentication method, and do not accept any user credentials, but the matching any existing UNIX account only.
So, we have to bring then the /var/lib/pgsql/data/pg_hba.conf to the following order, if we want to create customized psql accounts:
#"local" is for Unix domain socket connections only
local all all trust
#IPv4 local connections:
host all all 127.0.0.1/32 trust
IPv6 local connections:
host all all ::1/128 trust
IPv4 remote connections:
host all all 0.0.0.0/0 md5
IPv6 remote connections:
host all all ::/0 md5
#Allow replication connections from localhost, by a user with the replication privilege.
local replication all trust
host replication all 127.0.0.1/32 trust
From now after reload of the configuration with e.g. sudo systemctl reload postgresql we may connect to psql databases in a following way:
Without any auth if the login is performed from the same OS locally (local)
Without any auth if the login is performed from the same host (localhost; 127.0.0.1/32; ::1/128)
With password prompt if the login is performed from the outside
And at the end once more, login with customized user:
psql -U username -d postgres
… create your own database and connect to it:
CREATE DATABASE example_db WITH OWNER username;
\connect example_db
To check the database content use the \dt or \dt+ commands.
But it is not the complete solution. It gets obvious if we try to connect the psql from the remote host. Regardless the suthentification politics (remember, md5 password authentification from outside) the server doesn’t allow connections to default port 5432… Here is one more setting, which has to be done inside the main config file /var/lib/pgsql/data/postgresql.conf.
By default the paramenter listen_addresses = 'localhost' allows only the local connections. Here may be the entire list of IP addresses, perarated with ‘,’ pointed, or just set the parameter to listen_addresses = * to give an access from any forein IP.
Just as another cheatsheet, took from here, as usually though.
If you want to use a function in multiple source files (or rather, translation units), then you place a function declaration (i.e. a function prototype) in the header file, and the definition in one source file.
Then when you build, you first compile the source files to object files, and then you link the object files into the final executable.
Example code:
Header file:
#ifndef FUNCTIONS_H_INCLUDED
#define FUNCTIONS_H_INCLUDED

int add(int a, int b); // Function prototype, its declaration

#endif
First source file:
#include "functions.h"
// Function definition
int add(int a, int b) {
return a + b;
}
If the header file pointed inside the diamond < >, it supposes its location inside compiler libraries directory, if the quotes " " are used, the compiler looks for the .h file in the current directory.
How you build it depends very much on your environment. If you are using an IDE (like Visual Studio, Eclipse, Xcode etc.) then you put all files into the project in the correct places.
If you are building from the command line in, for example, Linux or OSX, then you do:
The flag -c tells the compiler to generate an object file, and name it the same as the source file but with a .o suffix. The last command links the two object files together to form the final executable, and names it my_program (that’s what the -o option does, tells the name of the output file).
This may be useful in some cases of change your mind of use of hibernation or missing swap partition during OS setup ocassionally or deliberately (e.g. in the case of Ubuntu LTS Server installation the mounting of swap partition leads to installer crash).
It’s fine if the storage device has unallocated disk space or additonal non-root partition, which may be shrinked to fit the swap one. We need usually 2xRAM size if hibernation mode supposed or some less if not.
Use resize2fs -p /dev/<partition name> <new size e.g. 128G> command to shrink the filesysem. It may require additional e2fsck command to be run (check the disk for errors), so follow the instruction.
It’s easy then:
fdisk /dev/<disk to process (e.g. sda)>
Step by step:
p – check the partition to resize, note Device and Start value
d – delete partition, number is the index after disk name (e.g. sda1 – partition number is 1)
n – new partition with the same first sector (Start) and the new size in accordance to new filesystem size defined during resize2fs command execution (very useful format is +128G, no need to calculate blocks and so on).
t – change the partition type if needed (if it doesn’t match initial type)
n – create new swap partition
t – change the partition type from default Linux to Linux swap / Solaris – hex code 82
p – shows new partitions layout, double check if it’s all right
w – write out the changes
The reboot may be needed to make the system to read the new disk layout.
It sounds worse if here is only the root-volume, which you have to bite off from. Simple way – LiveCD (or any installation USB-flash). The hard way – online root-volume resizing.
Check what’s happening with patritions: blkid – look for the storage device records you’ve just modified. Initiate swap on that partition.
mkswap <partition name (e.g. /dev/sda3)> blkid | grep <partition name (short, e.g. sda3 is enough> >> /etc/fstab – it adds the UUID containing string to the end of fstab file (it responsible for default partitions mounting points) to prevent boring UUID typing. Then edit fstab: nano /etc/fstab
Remove the line with swap.img completely and bring the last string to the following order, deleting all unnecessary garbage:
/dev/disk/by-uuid/<the symbols group following "UUID="> swap sw 0 0
Exit (Ctrl+X, save as prompted – y, confirm file name ‘fstab‘ <Enter>).
Refresh swap configuration:
swapon --all --verbose – it has to output some strings including mention of our swap partition.
Check if swap partition is OK: cat /proc/swaps – the swap file may be still in, but it disappears after reboot.
Usually it’s to be done under Linux setup shell console (open command shell from installation environment) or it may be conducted via setup-GUI (not supposed in present topic).
Recreate Windows partition: fdisk /dev/<disk to process (e.g. sda)>
Then, step by step:
p – check the Windows partition to resize (look HPFS/NTFS/exFAT partition with boot mark (*)), note Name and Start value
d – delete partition, number is the index after disk name (e.g. sda1 – partition number is 1)
n – new partition with the same first sector (Start) and the size as of resized filesystem (e.g. +128G)
t – change the partition type from default Linux to HPFS/NTFS/exFat – hex code 7
n – new swap partition for temporary storage of RAM content if needed (2xRAM size)
t – change the partition type from default Linux to Linux swap / Solaris – hex code 82
n – new partition for Linux (pick the favorite size or use the rest of unallocated space)
p – shows new partitions layout, double check if it’s all right
w – write out the changes
OK, get back to Linux installation and pick the Linux partition as root (/) and Linux swap as swap one mounting points.
BTW: In the case of Ubuntu LTS Server installation the mounting of swap partition leads to installer crash. Just miss the swap mounting then and add it later after system installation complete.
The trial follows the way I’ve discovered the solutions of the problem. Following it directly reproduces most of my mistakes and quests. If the final solution is necessary, it’s recommended to pre-read the article before you begin
All the shell commands consider root user is active (sudo runuser) or sudo execution is performed (sudo ...)
The general task is to prepare LEMP stack to proceed with webserver with some PHP-driven CMS (Content management system) onboard.
E.g. actual WordPress state demands PHP 7.4 installed, so go on with it on Oracle Cloud Infrastructure powered server.
Now I have a new configuration, it’s ARM64 Ampere A1 shape with 2 cores and 12 Gb RAM (it’s a half of what can be allowed in the frame of Always Free Eligible performance). The OS image is standard Oracle Linux 8.
PHP 7.4
Installing the PHP directly from OL8 AppStream (default Oracle Linux repository) by default provides us with version 7.2, which is lower than expected.
The googling leads to: init epel (an additional package repository that provides easy access to install packages for commonly used software) and remi (free and stable YUM/DNF repository mainly for the PHP stack) repositories; install the latest versions from there.
BUT: if some ARM64 (aarch64) is in use, the remi repository is not our way, it has no build for aarch64. The solution appears to be simplier: OL8 AppStream (aarch64) already contains modules of PHP up to 7.4, just enable 7.4 instead of 7.2 by default.
If some of php is already installed the try to enable a different version causes error message.
Remove previous installation if any persists, reset PHP module and enable a new one. And after install PHP and its the most common frameworks.
Talking ahead, I’ve lost 3 days fighting with WordPress error 404 and trying to trace along the bunch of PHP-modules, until nginx logs (/var/log/nginx/) display the multiple records with json_decode() funtion, which is undefined: missed php-json during php installation.
The common advice, which may be found on every LEMP/LAMP stacks or PHP installation manuals: to restrict the try of find a proper action from the side of PHP-processing module if requested file is not found – it may lead to the vulnerability against the script injection attacks, which I have a blured understanding about, but sounds nasty. So, protect yourself:
nano /etc/php.ini
Find and correct the parameter (‘1’ to ‘0’)
cgi.fix_pathinfo=0
nginx
The easiest in the present trial is to install the nginx itself:
dnf install nginx
Open firewall for http traffic:
firewall-cmd --permanent --add-service=http
Check if http service is succesfully registered:
firewall-cmd --permanent --list-all | grep http
Register nginx as a permanent runnung service:
systemctl enable --now nginx
Check the nginx is running:
systemctl status nginx
Open a browser on a remote PC or on GUI and type in your server address (try ip addres show shell command on the server if to display network interfaces with addresses). The nginx dummy page appears in the browser window:
nginx test page
Setup
Now, get to PHP and configure PHP to work with nginx: here is the php-fpm responsibility.
nano /etc/php-fpm.d/www.conf
The nginx runs under its own user ‘nginx’ by default. So set the same for php-fpm.
In [www] section find and replace user and group designations: user = nginx group = nginx
It’s time to check how it works. Create the test php-module :
cd /usr/share/nginx/html/
echo '<?php phpinfo();>' >> info.php
Then use the chown command to assign the new file to the nginx user:
chown nginx.nginx /usr/share/nginx/html/info.php
Enable php-fpm and restart nginx:
systemctl enable --now php-fpm
systemctl restart nginx
Check if it all run:
ps -efl | grep nginx
The output has to have a look a kind of:
5 S nginx 1517785 1517784 0 80 0 - 889 ep_pol 07:19 ? 00:00:00 nginx: worker process
5 S nginx 1517786 1517784 0 80 0 - 889 ep_pol 07:19 ? 00:00:00 nginx: worker process
5 S nginx 1530145 1530144 0 80 0 - 3468 skb_wa 08:09 ? 00:00:00 php-fpm: pool www
5 S nginx 1530146 1530144 0 80 0 - 3468 skb_wa 08:09 ? 00:00:00 php-fpm: pool www
5 S nginx 1530147 1530144 0 80 0 - 3468 skb_wa 08:09 ? 00:00:00 php-fpm: pool www
5 S nginx 1530148 1530144 0 80 0 - 3468 skb_wa 08:09 ? 00:00:00 php-fpm: pool www
5 S nginx 1530149 1530144 0 80 0 - 3468 skb_wa 08:09 ? 00:00:00 php-fpm: pool www
Finally, open the web browser and enter server address (IP or domain) with test file after:
<server address>/info.php
The following PHP-info page has to be displayed in browser window:
PHP info page
In many manuals and advices it’s recommended not to use the default users to run web-engine and PHP process manager, therefore let’s create a new one (add -M to prevent the creation of home-directory):
sudo useradd -M web
This user is supposed to be pointed in nginx and php-fpm config files (actually it can be a different users, doesn’t matter, but for this example we use the same for both modules):
sudo nano /etc/nginx/nginx.conf
Find and set the parameter:
user web;
Then fix php-fpm config a little:
nano /etc/php-fpm.d/www.conf
In [www] section find and replace user and group designations: user = web group = web
Now, restart php-fpmnginx:
systemctl restart php-fpm
systemctl restart nginx
Check if it all works: sudo ps -efl | grep web
Enter the test address into the browser address field…
… and…
It’s a traditional thing for most of IT trials and Stackoverflow threads – it doesn’t work. If the user of nginx is changed to anything else than ‘nginx’, the php-fpm loses the bind with nginx and the error 503 (‘Service temporarily unavailable’) appears instead of php-info page.
This is a thing, which broke my mind completely (it appears to be quite easy to do): direct googling requests led to common installation and setup manuals and simple forum debates, but no mention of the sympthom, mostly, reckon, because it’s hardly possible to formulate the problem itself clearly to make the search engine understand, which trouble is actually meant.
Most of example configs have the following parameters inside /etc/php-fpm.d/www.conf active:
listen.owner = web
listen.group = web
listen.mode = 0660
If the different users set for nginx and php-fpm, the listen.owner and listen.group have to be equal to nginx config values.
OK, set them up and restart php-fpm and check the status of the service:
systemctl status php-fpm
Something is not so good, we have the warnings:
WARNING: [pool www] ACL set, listen.owner = 'webserver' is ignored
WARNING: [pool www] ACL set, listen.group = 'webserver' is ignored
Now, google the ignoring of listen. parameters relative to ACL and the serverfault discussion is on the top. Appears the additional parameters of access control located a bit below in /etc/php-fpm.d/www.conf:
; When POSIX Access Control Lists are supported you can set them using
; these options, value is a comma separated list of user/group names.
; When set, listen.owner and listen.group are ignored
listen.acl_users = apache, nginx
;listen.acl_groups =
Thank gosh, it’s found. Here are a couple of way how to proceed:
Change the apache, nginx value to our web and comment listened. parameters
Comment the string listen.acl_users = apache, nginx, keeping user, owner and listened. parameters active.
Finally restart php-fpm and nginx and enjoy the PHP test page again.
These tools work together with dnf or yum. DNF handles dependency solving, finding files on the network, repository management, and so on. RPM handles the lower-level part of actually putting the files on the system.
In most cases as an end user, DNF is all you need to interact with. You might use RPM commands for lower-level troubleshooting, but in most cases DNF provides all the functionality in a more friendly manner.
list all rpm packages in a kind brutal manner (usually apply | grep “something” to find desired package)