Initial setup. netplan.
This is a nice explanation from linuxhint.ca
View Current IP Address
To view the current IP address of your machine, you can use either of the following commands:
$ ip a
Or
$ ip addr
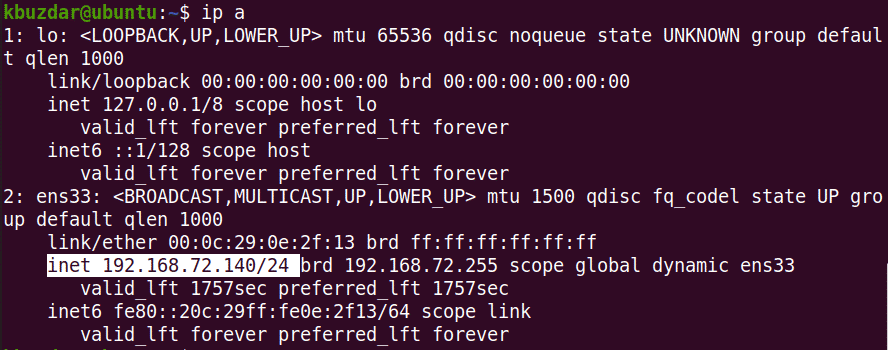
Running either of the above commands will display the IP address information. Note down the name of the interface from the output of the above command.
Configuring
In the following procedure, we will see how to set up the static IP in a Ubuntu system.
Ubuntu 20.04 uses netplan as a default network manager. The configuration file for the netplan is stored in the /etc/netplan directory. You can find this configuration file listed in the /etc/netplan directory the following command:
$ ls /etc/netplan
The above command will return the name of the configuration file with the .yaml extension, which in my case was 01-network-manager-all.yaml.
Before making any changes to this file, make sure to create a backup copy of it. Use the cp command to do so:
$ sudo cp /etc/netplan/01-network-manager-all.yaml 01-network-manager-all.yaml.bak
Note: You might have a configuration file with the name other than the 01-network-manager-all.yaml. So make sure you use the right configuration file name in the commands.
You can edit the netplan configuration using any text editor. Here we are using the Nano text editor for this purpose.
$ sudo nano /etc/netplan/01-network-manager-all.yaml
Then add the following lines by replacing the interface name, IP address, gateway, and DNS information that fit your networking needs.
network:
version: 2
renderer: NetworkManager
ethernets:
ens33:
dhcp4: no
addresses:
– 192.168.72.140/24
gateway4: 192.168.72.2
nameservers:
addresses: [8.8.8.8, 8.8.4.4]
Once done, save and close the file.
Now test the new configuration using the following command:
$ sudo netplan try
If it validates the configuration, you will receive the configuration accepted message; otherwise, it rolls back to the previous configuration.
Next, run the following command to apply the new configurations.
$ sudo netplan apply
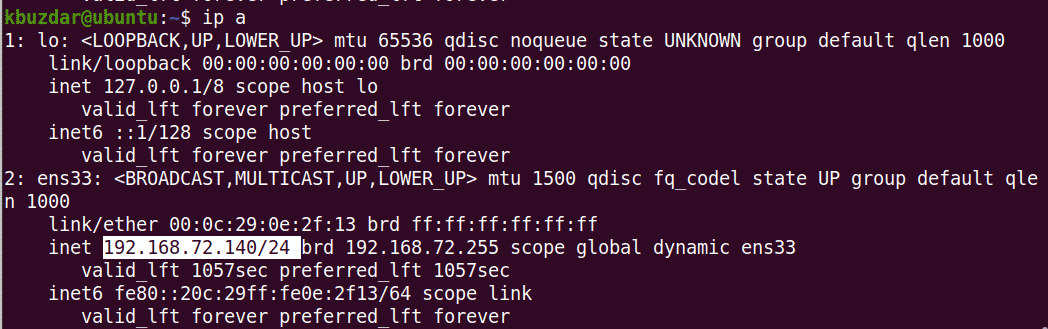
After this, confirm the IP address of your machine using the following command:
$ ip a
It should reflect the changes you have made.
Connection type priority. ifmetric.
Very nice tool, pulled from superuser.com, thanks to shivams.
This command can be used to change the metric of any interface. The interface with lower metric is preferred for Internet.
It can be installed using sudo apt-get install ifmetric.
To use this, first see the metrics using route command:
$ route -n

Kernel IP routing table
Destination     Gateway         Genmask         Flags Metric Ref    Use Iface
0.0.0.0         10.42.0.1       0.0.0.0         UG    100    0        0 eth0
0.0.0.0         10.42.0.2       0.0.0.0         UG    600    0        0 wlan0
Here, eth0 has lower metric, so it will be preferred over wlan0. If you want to prefer wlan0, then lower its metric:
sudo ifmetric wlan0 50
Now, the routing table would look like:
$ route -n

Kernel IP routing table
Destination     Gateway         Genmask         Flags Metric Ref    Use Iface
0.0.0.0         10.42.0.2       0.0.0.0         UG    50     0        0 wlan0
0.0.0.0         10.42.0.1       0.0.0.0         UG    100    0        0 eth0
Now Linux will prefer wlan0 for Internet. The changes are being applied immediately.